
Connect Java VisualVM or jconsole via SSH tunnel
Posted by Dirk Dresselhaus in Miscellaneous on 2019-08-30
Often, when working with Java machines behind firewalls, there is the requirement to debug or analyze Java servers or processes in general using tools like Java VisualVM, jconsole or others. To make it as simple as possible, JMX- and RMI-ports need to be configured on Java application server and authentication or certificate checking for security are disabled in this example.
Java application on remote server
When starting up the application, add these (sample) configuration parameters:
-Dcom.sun.management.jmxremote.port=9010 -Dcom.sun.management.jmxremote.authenticate=false -Dcom.sun.management.jmxremote.ssl=false -Dcom.sun.management.jmxremote.local.only=false -Dcom.sun.management.jmxremote.rmi.port=9011 -Djava.rmi.server.hostname=localhost |
Both ports need to be tunneled via SSH to be accessible on the local machine.
SSH-Tunnel on local machine
When working on *nix environments, the default SSH command is capable to establish the SSH-tunnel to the remote server.
Default command:
ssh -C $username@$server_ip -L $port_local_machine:localhost:$port_remote_machine |
Example command to map both ports from example above:
ssh -C $username@$server_ip -L 9010:localhost:9010 -L 9011:localhost:9011 |
Another solution, especially on Windows machines, would be to use PuTTY.
In PuTTY Configuration window, select the category: “Connection” – “SSH” – “Tunnels” and put the necessary configuration in “Add new forwarded port”:
For this example:
Source port: 9010
Destination: localhost:9010
Choose “Local”- and “Auto”-radiobox and press the “Add”-Button.
Source port: 9011
Destination: localhost:9011
Choose “Local”- and “Auto”-radiobox and press the “Add”-Button.
Debug tool
Java VisualVM, jconsole or other tools can be used by starting them on the local machine and telling them to connect to a remote process: “localhost:9010”
Spring Framework: load resources sorted by filename
Posted by Dirk Dresselhaus in Miscellaneous on 2016-10-21
Sometimes it is necessary to load classpath-resources for working with them (e. g. loading data). In this case, the additional requirement was to provide the resources in a sorted way. The implementation is done with the ResourcePatternResolver from Spring Framework.
Custom resource comparator for sorting the resources:
1 2 3 4 5 6 7 8 9 10 11 12 13 14 15 16 17 18 19 20 21 22 23 24 25 26 27 28 29 30 31 | import org.springframework.core.io.Resource; import org.springframework.util.StringUtils; import java.util.Comparator; public class ResourceComparator implements Comparator<Resource> { @Override public int compare(Resource r1, Resource r2) { if (r1 == null || r2 == null || StringUtils.isEmpty(r1.getFilename()) || StringUtils.isEmpty(r2.getFilename()) ) { return 0; } final char v1[] = r1.getFilename().toCharArray(); final char v2[] = r2.getFilename().toCharArray(); int len1 = v1.length; int len2 = v2.length; int lim = Math.min(len1, len2); int k = 0; while (k < lim) { char c1 = v1[k]; char c2 = v2[k]; if (c1 != c2) { return c1 - c2; } k++; } return len1 - len2; } } |
The class loading the resources and providing them in a sorted way:
1 2 3 4 5 6 7 8 9 10 11 12 13 14 15 16 17 18 19 | import org.springframework.core.io.Resource; import org.springframework.core.io.support.PathMatchingResourcePatternResolver; import org.springframework.core.io.support.ResourcePatternResolver; import java.util.Arrays; public class ResourceLoader { private static final String PATTERN = "resource*.xml"; public void loadResources() { ClassLoader cl = this.getClass().getClassLoader(); ResourcePatternResolver resolver = new PathMatchingResourcePatternResolver(cl); Resource[] resources = resolver.getResources("classpath*:" + PATTERN); Arrays.sort(resources, new ResourceComparator()); for (Resource resource : resources) { //process the resources } } } |
High CPU load: finding the responsible Java thread in Linux/Unix
Posted by Dirk Dresselhaus in Miscellaneous on 2014-10-10
If a running Java application on a machine generates (too) much CPU load it is often necessary to identify the Java thread which is responsible for this behaviour. On a Linux or Unix environment this can easily be done by using a shell:
Finding the problematic Java process
The “top”-command which shows tasks sorted by load intensity is available on nearly all installations:
$ top |
Analysing the given table it is quite simple to find out the PID (process id) of the Java process that causes the problem.
Another way is to use the “ps” command to identify the process:
$ ps axu | grep java |
Creating a thread dump
Next step is to create a thread dump using the command “jstack”. This command is part of the JDK, so it is normally available per default. “jstack” needs the PID of the Java process given as parameter. If “jstack” hangs or does not respond it has to be forced to take the dump using the “-F” parameter. It is also a good idea write its output into a file, an example with PID=12345 that writes a file into “/tmp” directory:
$ jstack -F 12345 > /tmp/heapdump |
Identifying the problematic Java thread(s)
The “top” command is also able to display all threads of a task by pressing “H” when started or using the “-H” parameter:
$ top -H |
So this time the PID(s) of problematic thread(s) can also be found out.
Now it is possible to find information about the thread(s) causing the problem by searching the heapdump file for these PIDs, assuming a PID is 32145:
-in a dump created with Java 7 and newer a PID can be found directly, for example:
Thread 32145: (state = IN_NATIVE)
-in a dump created with Java 6 and earlier it is necessary to convert the PID to a HEX value, also using BASH for example:
$ printf '%x\n' 32145 |
The result for this example is “7d91” and can be found in heapdump file as an “nid”, for example:
“Thread-0” prio=10 tid=0x00002f6a98760000 nid=0x7d91 runnable [0x00001f9a4d123000]
Design Patterns: Singleton in Java
Posted by Dirk Dresselhaus in Miscellaneous on 2014-01-07
A singleton is a design pattern that should restrict instantiation of a class to one single object. Normally a singleton contains a static getInstance() method that returns this instance.
The classic version of a singleton: lazy initialization
The modifier private of the standard constructor prevents instantiation from outside the class here. The getInstance() method creates the static instance on its first call:
1 2 3 4 5 6 7 8 9 10 11 12 13 | public class SingletonClassic { private static SingletonClassic instance = null; private SingletonClassic() { } public static SingletonClassic getInstance() { if (instance == null) { instance = new SingletonClassic(); } return instance; } } |
This version of a singleton can lead to problems on multithreading-environments if getInstance() is called by two (or more) threads simultaneously at the time the static instance is not already there. In this case it is possible that two different instances are being created and returned. A simple solution would be to add the synchronized modifier to the getInstance() method:
1 2 3 4 5 6 7 8 | [...] public static synchronized SingletonClassic getInstance() { if (instance == null) { instance = new SingletonClassic(); } return instance; } [...] |
But this solution is not really nice because getInstance() only has to be synchronized at the time creating its instance. The cost of synchronized parts on multithreading-environments can be much higher (threads waiting for other threads to release the lock), so often these parts are slower executed.
Singleton using double-checked locking idiom
To solve the problem from above, it is possible to implement a singleton using the double-checked locking idiom that should restrict the part which has to run synchronized. This will only work with Java 5 and newer versions (change of volatile modifier, explained here).
1 2 3 4 5 6 7 8 9 10 11 12 13 14 15 16 17 | public class SingletonDoubleCheckedLocking { private static volatile SingletonDoubleCheckedLocking instance = null; private SingletonDoubleCheckedLocking() { } public static SingletonDoubleCheckedLocking getInstance() { if (instance == null) { synchronized (SingletonDoubleCheckedLocking.class) { if (instance == null) { instance = new SingletonDoubleCheckedLocking(); } } } return instance; } } |
Singleton with eager initialization
If creating an instance inside the singleton class is always needed, this is a solution that easily gets around the synchronizing-problems. The instance is created when the class is used. The final modifier ensures that it is not replaced or redefined.
1 2 3 4 5 6 7 8 9 10 | public class SingletonEagerInit { private static final SingletonEagerInit INSTANCE = new SingletonEagerInit(); private SingletonEagerInit() { } public static SingletonEagerInit getInstance() { return INSTANCE; } } |
Singleton using initialization-on-demand holder idiom
If it is a problem that the instance is automatically created at the time the class is being accessed like in the example above (perhaps in case of high cost or huge amount of resources necessary), here is the solution:
1 2 3 4 5 6 7 8 9 10 11 12 13 | public class SingletonWithHolder { private static class LazyHolder { private static final SingletonWithHolder INSTANCE = new SingletonWithHolder(); } private SingletonWithHolder() { } public static SingletonWithHolder getInstance() { return LazyHolder.INSTANCE; } } |
This solution is as lazy as possible, creating the instance only if getInstance() is called.
Singleton using enum
Probably the most recommended version of implementing a singleton using a Java version that supports it is using enums.
1 2 3 4 5 6 7 | public enum Singleton { INSTANCE; public void execute() { [...] } } |
The singleton can be used like this:
Singleton.INSTANCE.execute(); |
Uptime image
Posted by Dirk Dresselhaus in Miscellaneous on 2013-05-17
With PHP, creating dynamic images is easy. For example combined with some shell commands, it is possible to generate a dynamic image which displays server uptime and some kernel infos:
Code:
1 2 3 4 5 6 7 8 9 10 11 12 13 14 15 16 17 18 19 20 21 22 | <?php header("Content-type: image/png"); $image = imagecreatefrompng("uptime.linux.png"); $font_size = 7.5; $color = imagecolorallocate($image, 255, 255, 255); $uptime = exec("/bin/cat /proc/uptime | /usr/bin/cut -f 1 -d ' '"); $days = (int) ($uptime / 86400); $uptime -= $days * 86400; $hours = (int) ($uptime / 3600); $uptime -= $hours * 3600; $minutes = (int) ($uptime / 60); $act_dir = getcwd(); ImageTTFText($image, $font_size, 0, 55, 15, $color, $act_dir."/Tahoma.ttf", "http://www.dresselhaus.biz"); ImageTTFText($image, $font_size, 0, 55, 34, $color, $act_dir."/Tahoma.ttf", "Host: ".exec("hostname -f")); ImageTTFText($image, $font_size, 0, 55, 45, $color, $act_dir."/Tahoma.ttf", "Uptime: ".$days. "d ".$hours."h ".$minutes."m"); ImageTTFText($image, $font_size, 0, 55, 56, $color, $act_dir."/Tahoma.ttf", "System: ".exec("uname")." (".exec("uname -m").")"); ImageTTFText($image, $font_size, 0, 55, 67, $color, $act_dir."/Tahoma.ttf", "Kernel: ".exec("uname -r")); imagepng($image); imagedestroy($image); ?> |
Twitter client with Spring Social
Posted by Dirk Dresselhaus in Projects on 2013-05-16
Integrating social network activity into (customer) websites and because I have been using the Spring Framework and also Spring MVC and Spring Security for a long time, I decided to take a closer look at the Spring Social project. So I created a small application that should just display the timeline of my Twitter accounts and have the possibility to post something quickly.
-

- Social app
Social app displaying Twitter homefeeds with images

Yes, I know my .css skills are incredible. 😉 I was missing an example to “quick and dirty” connect (and so authorise your social app to your account) and getting back the access token for testing the API without using a database or Spring Security on Spring Social samples, so I created a very simple way to connect to a Twitter account:
1 2 3 4 5 6 7 8 9 10 11 12 13 14 15 16 17 18 19 20 | @Controller public class AuthController { private OAuth1Operations oauthOperations; private OAuthToken requestToken; @RequestMapping(value = "/connect", method = RequestMethod.GET) public String connect() { TwitterConnectionFactory connectionFactory = new TwitterConnectionFactory(CONSUMER_KEY, CONSUMER_SECRET); oauthOperations = connectionFactory.getOAuthOperations(); requestToken = oauthOperations.fetchRequestToken("http://localhost:8080/callback", null); String authorizeUrl = oauthOperations.buildAuthorizeUrl(requestToken.getValue(), OAuth1Parameters.NONE); return "redirect:" + authorizeUrl; } @RequestMapping(value = "/callback") public @ResponseBody OAuthToken callback(@RequestParam(value = "oauth_token") String oauthToken, @RequestParam(value = "oauth_verifier") String oauthVerifier) { OAuthToken accessToken = oauthOperations.exchangeForAccessToken(new AuthorizedRequestToken(requestToken, oauthVerifier), OAuth1Parameters.NONE); return accessToken; } } |
Fun project: small role playing game
Posted by Dirk Dresselhaus in Projects on 2013-04-16
I always was interested in computer games, so I wanted to create a small role playing game for fun and self-education. In 2007 I started to do this from scratch, so I did not use any existing libraries, just plain Java. I decided to develop a tile-based 2D game engine. It is not finished yet (it is more work than one could expect at first sight if you want to do a good job), I work on it when I have time and feel like it.
Features that work at this time:
- Walking around using the arrow or “WSAD”-keys
- Collision detection and “hiding” behind greater items (like trees)
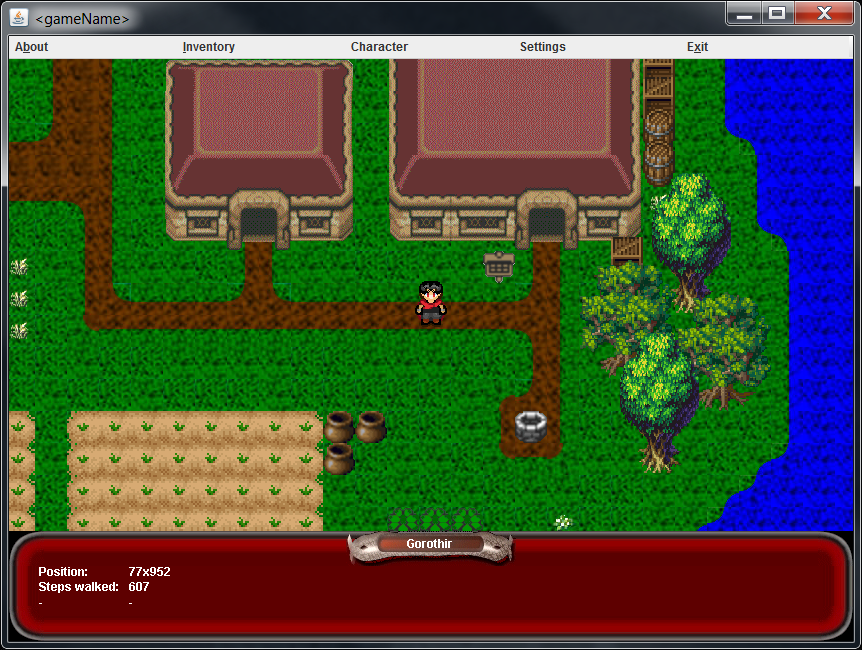
- Mouse support on the map, left click: select an enemy or pick up items (weapon, shield, armor) to be added to inventory, right click: look at/read items
- Inventory functionality (to open press “C”), mouse left click: inspecting items (weapon, shield, armor) in detail, mouse middle click: throw items away, mouse right click: equip items
- Equipped items extend statistics of the player (more health, armor or damage)
- Entering houses and other teleport events
- Very basic balancing engine (with items attached, defeating an enemy is easier)
- Two enemies walking on the map that will attack the player if (really) near, select enemy with a left click of the mouse to fight back, one ememy carries loot
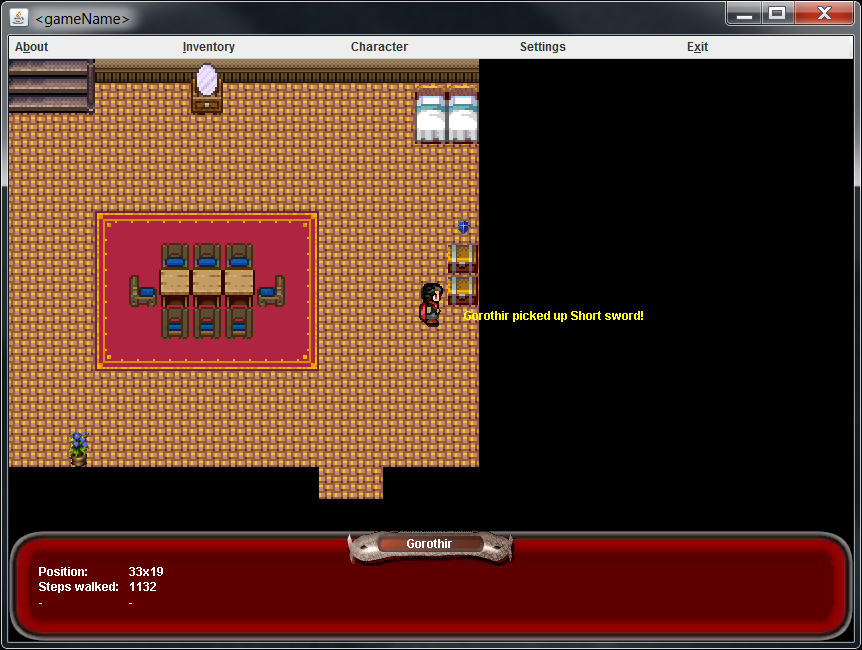
- Map editor to design new maps and all items on it
-
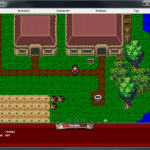
- Playing the game
Playing the game
-

- Picking up items
Picking up items in game
-
- Map editor
The map editor for the game

In 2007, using Java Web Start was quite a good idea and I did not change that so far.
LOTROArmory
Posted by Dirk Dresselhaus in Projects on 2013-03-22
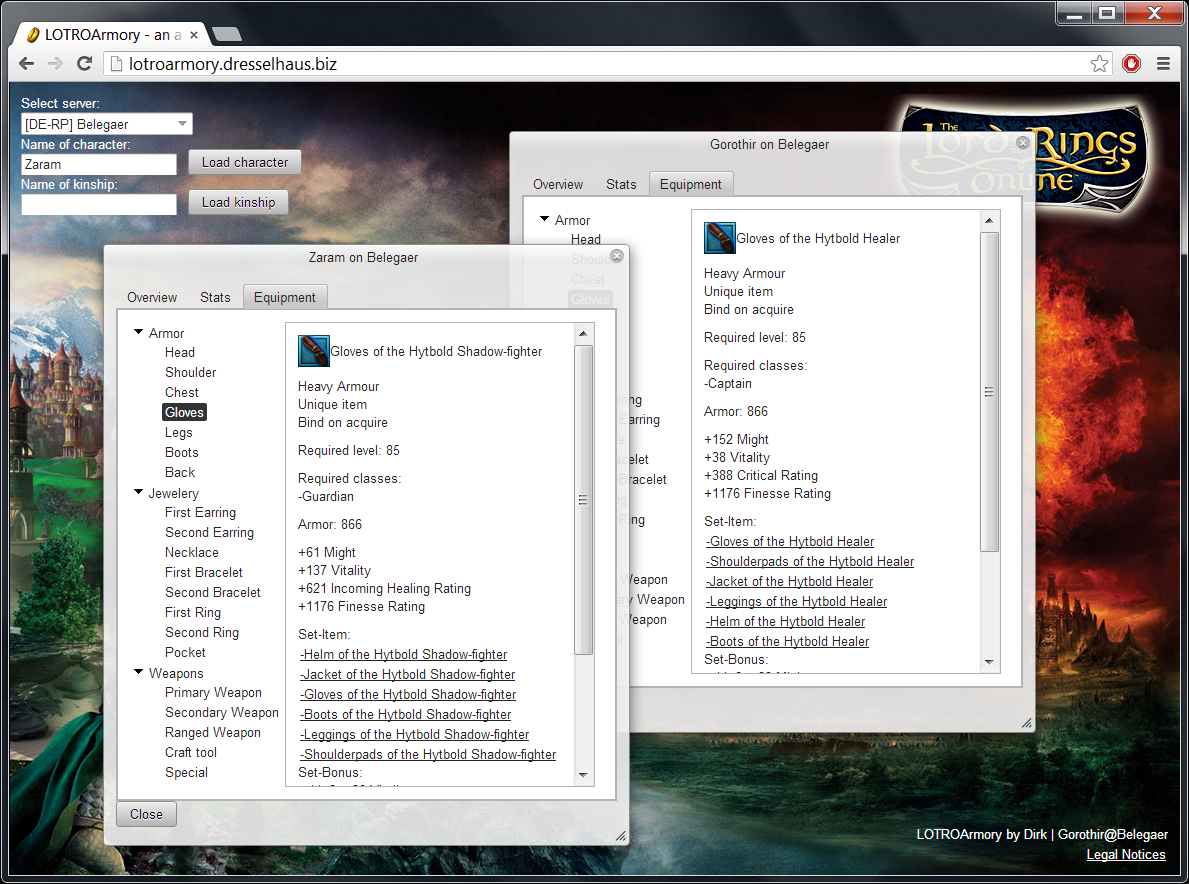
I wanted to test the Java framework Vaadin and to make this more interesting (and perhaps somehow useful), I decided to implement the data.lotro.com-API of the game The Lord of the Rings Online by Turbine and create an armory/arsenal where the user can easily compare characters. I chose Castor XML as XML framework.
Unfortunatelly the data.lotro.com-API is not always accessable and sometimes disabled by Turbine, so that it is not possible to get information from the server. Because of that I recently implemented a method to load “old” data from the local database by enabling the checkbox “Use local database”.
Furthermore the API is also not complete and not able to provide all data (e.g. newer items are often unavailable).
-

- LOTROArmory: display character info
LOTROArmory: display character info of "Gorothir"

-

- LOTROArmory character compare
LOTROArmory comparing characters in internal frames
-

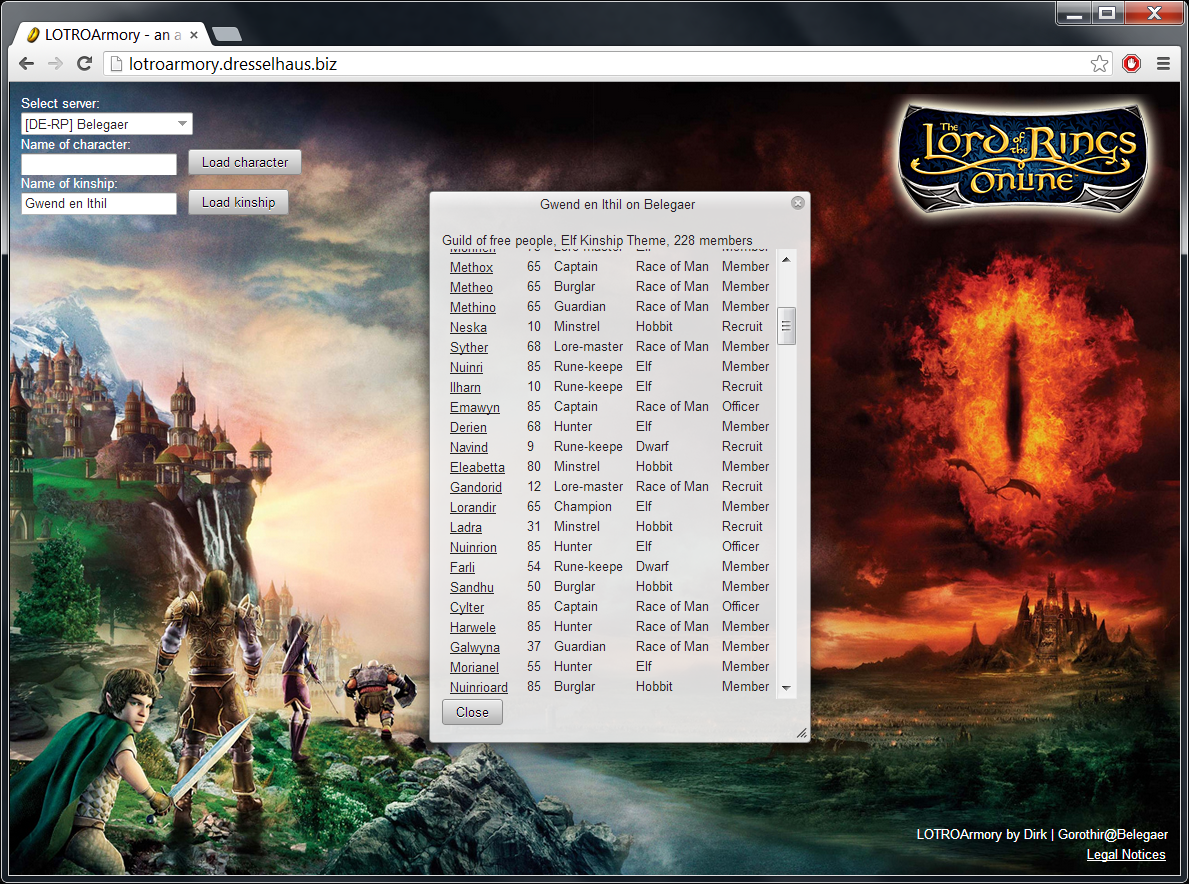
- LOTROArmory display kinship information
LOTROArmory display kinship information of "Gwend en Ithil"
Possible test data:
Server: [DE-RP] Belegaer
Character: Gorothir
Enable checkbox “Use local database” if error occurs (which means that the data.lotro.com-API is not available at this moment).
Link to LOTROArmory (no longer online)
Hello world!
Posted by Dirk Dresselhaus in Miscellaneous on 2013-03-16
Just set up WordPress, so this site is still under construction. Please come back later! 🙂